Carry out cancellations or partial cancellations of ticketing orders
Completed orders can be fully or partially canceled in the backend. Invitario automatically generates a credit note and attaches it to the order.
Step 1: Search and open the order
- Go to > Ticketing > Orders to view all guest orders.
- To search for the order to be canceled, enter the guest's name in the search field and confirm the entry.
- Open the order by clicking on the order number or using the quick menu > View.
Step 2: Perform cancellation
In the Orders tab, the ordered ticket(s) are displayed in the table.
- Click the "Cancel" icon
in the toolbar at the top right to start the cancellation process.
- To initiate a partial cancellation, click the
icon in the respective ticket row of the table.
The "Create Cancellation" page will now open: 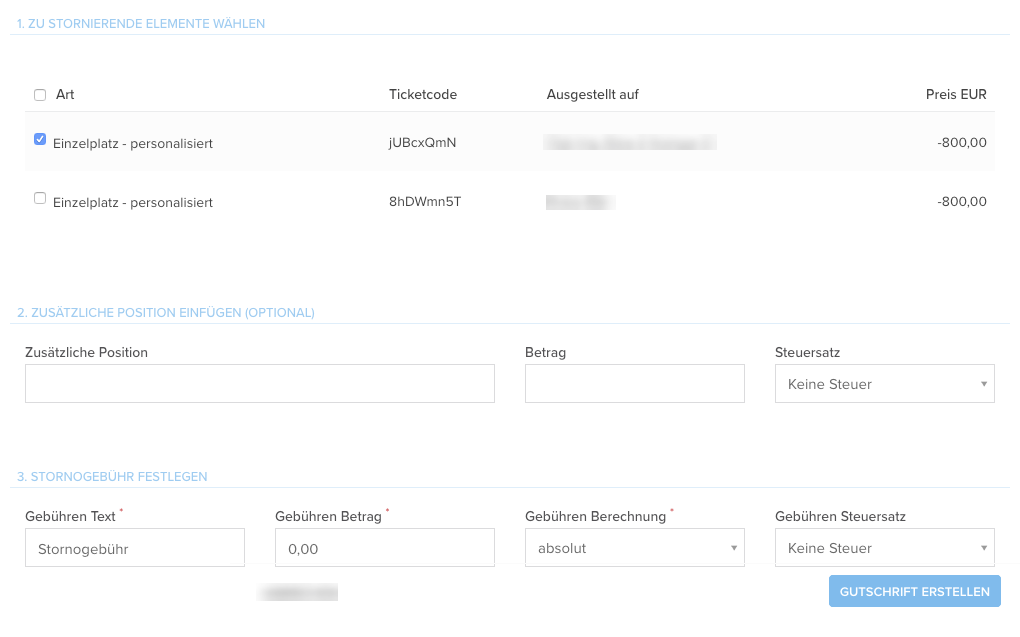
- 1. Select items to be canceled: Use checkboxes to select all items to fully cancel the order. For a partial cancellation, select one or more specific items using checkboxes.
- 2. Add additional item (optional): In the "Additional Item" field, you can add an item to be listed in the cancellation invoice/credit note. Entering a negative number in the "Amount" field is allowed.
- 3. Set cancellation fee: Choose whether and to what extent the cancellation fee specified in the ticketing configuration should be applied.
- Click "Create Credit Note" to complete the process.
Step 3: View canceled orders
- In the order, under the "Order" tab, the canceled items will now be displayed in gray.
- A canceled ticket is no longer valid and cannot be checked in.
- To view an individual credit note, click the button in the respective credit note section.
- The "Invoice PDF" icon
opens all invoices and credit notes associated with the order in one multi-page PDF.

After confirming a (partial) cancellation, the generated credit note is not automatically sent to the buyer by Invitario. You must manually send the credit note. Optionally, you can use a mailing created in > Mailings by inserting the macro "Invoice PDF (URL)" ("{{order.invoicePdf.url}}"), which includes all invoices and credit notes of the order.

If an order with the payment methods "Credit Card" or "Sofort Transfer" is canceled, the refund of the collected amount must be manually triggered in your STRIPE or KLARNA accounts.