Working with surveys
1. Creating Questions
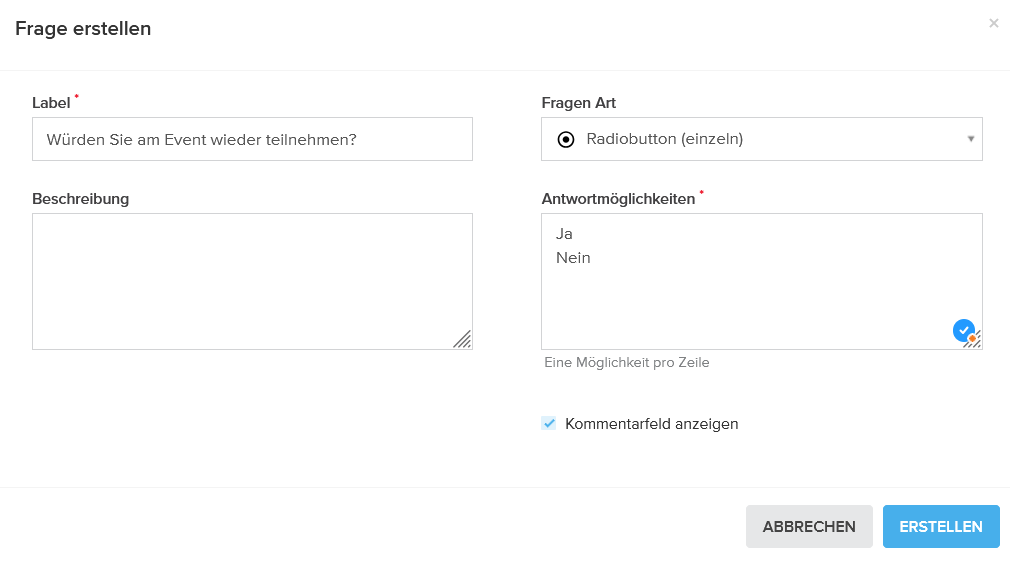
Navigate to the Surveys > Questions menu at the account level and click the + icon. In the input field Label, write your question, then select the appropriate question type and add answer options if needed. In Description, optionally add more context that appears below the question. Enable “Show comment field” if participants should receive an open text box below the question. Click Create to save your question.

Pro Tip: Created questions can be added to multiple feedback forms. When creating questions, it is advisable to think about which questions could be included across all or several feedback forms.
2. Overview of Question Types
The icons next to the question types in the menu provide orientation about the type of question:
| Question Type |
Properties
|
Restrictions
|
|
Short answer
|
Free text response
|
Max. 150 characters
|
|
Paragraph
|
Free text response
|
Max. 2000 characters
|
|
Dropdown (single)
|
Drop-down menu, one answer
|
-
|
|
Checkbox
|
All options visible, multiple answers
|
-
|
|
Radiobutton (single)
|
All options visible, one answer
|
-
|
|
Multiple-choice grid
|
Questions as rows, answer options as columns, one answer per row
|
-
|
|
Linear scale
|
Numerical scale for evaluation
|
Value range freely selectable
|
| Contact request |
Yes/No question with forwarding URL for “Yes”
|
Forwarding URL required
|
3. Creating a Feedback Form
Open Surveys > Feedback Forms and click the + icon. In the Settings tab, assign a meaningful name and select a design from your templates. You can also secure the form from bots using Captcha. (To prevent automated input from bots, it is recommended to always secure the feedback form with Captcha.) In the Questions tab, add your prepared questions using the dropdown and adjust the order with arrows. In the Confirmations tab, compose the text shown after submission or link to a custom page.

Pro Tip : A question can be used in any number of feedback forms.
4. Testing and Publishing the Feedback Form
Open the new feedback form directly in the overview and use Test Mode to check the user experience:

Click Published to make the form available in your events:
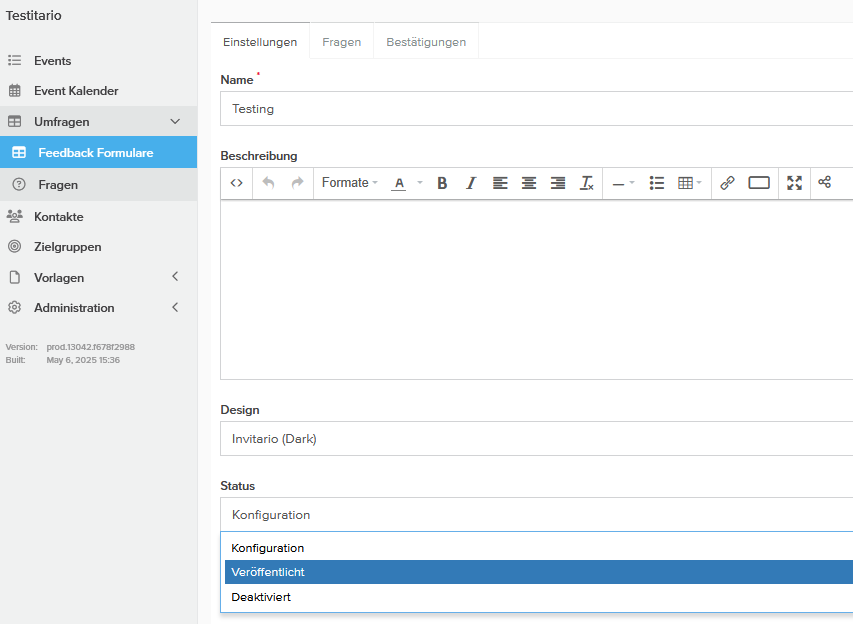
Click Published to make the form available in your events:
5. Embedding Surveys in Events
Open the desired event and go to the Feedback Forms menu. Add your published form using the + icon and preview it using the Open button.
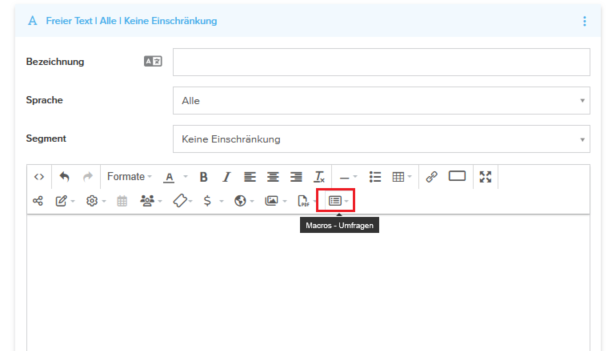
6. Integrating Surveys in Mailings
Embed the survey macro as a link or button in a mailing to address respondents directly:
7. Exporting Responses
Invitario offers three ways to export anonymous responses from participants for analysis purposes.
At the Event Level
This option is available to all Event Users. To export results, click "Download" and choose either 'Excel file' or 'CSV file':
At the Account Level
With Account User permission, you can also perform cross-event analysis by downloading results from surveys used in multiple events:
As an Account User, you can also analyze responses to specific questions across events to gain deeper insights.